April 26, 2013

April (Baby! and Wedding!) Showers

Polenta Ricotta Honey Cake 
with Lemon Blueberry topping
{original recipe from vintage kitchen notes}

I had the pleasure of spending this past weekend with my five best friends from college. Simply put, these ladies are amazing. And inspiring. And fun. And creative. This reunion was full of many celebratory life moments, including pending nuptials, growing bellies, new homes, growing broods, health & happiness. Tea parties take center stage at our reunions. Whether at a fancy tea house (a la Alice's Tea Cup in NYC or Peacock Alley at the Willard in DC) or in pjs at home, tea parties truly feel indulgent. Baked treats accompanied by clotted cream & lemon curd are all requisites.


This time around, I tried to inject a bit of wholesome into the indulgent mix. This polenta ricotta honey cake had a nutty texture, providing a nice complement to the tangy blueberry topping. The cake was a bit crumbly but still nice & moist. We served this with a salmon & leek quiche and a spinach & toasted pine nut quiche, as well as a arugula based salad filled with spring greens & a goat cheese dressing. If you like a traditional Italian almond cake, this one is definitely worth trying. 


cake ingredients:
1 cup polenta or yellow cornmeal
1/2 cup all purpose flour
1 tsp baking powder
1/4 tsp salt
1 cup ricotta

1/3 cup tepid water
3/4 cup honey
3/4 cup sugar
zest of 1 lemon
8 tbsp butter, melted & cooled
1 tbsp butter, cut into bits & chilled
2 large eggs

topping ingredients:
1 cup blueberries, fresh or frozen
1/4 cup lemon juice
1/3 cup light brown sugar

1.  pre-heat oven to 350F.

2. Line bottom of a 9 inch springform cake pan with parchment paper (I actually did without, and had no problem transferring the cake to a pretty serving tray afterwards). 

3. spray or butter the sides of the cake pan.

4. mix polenta, flour, baking powder & salt in a bowl.

5. beat the ricotta cheese with the water until it is a smooth, uniform texture. Add honey, sugar & lemon zest, continue to beat until smooth. 

6. gradually add the melted & cooled butter. then add the eggs, one at a time. continue to beat until mixture is smooth. 

7. slowly fold the wet ingredients in small batches into the dry ingredients until smooth. 

8. pour the mixture into the cake pan. dot the top of the batter with the bits of butter. 

9. bake for about 35 minutes, or until an inserted toothpick comes out clean.

10. for the blueberry sauce, on the stovetop, mix blueberries, lemon juice & sugar. cook for about 5 minutes over low heat until the blueberries wrinkle & loose their shape.

11. transfer onto a cake platter. serve with the blueberry sauce & a dusting of powdered sugar. 


April 24, 2013

Lately, Snacking On....Chocolate.

Theo Congo vanilla nib chocolate

I am a sucker for good dark chocolate. I am also a nerd for compelling infographics. Meet Theo Chocolate, where my love for chocolate and infographics collides. I can't get enough!

Theo is a proud partner to Ben Affleck's Eastern Congo Initiative. Support this great cause and get your next chocolate fix here. Or at Whole Foods nationwide. 


Watch Ben Affleck on his vision for the Eastern Congo Initiative. 

April 16, 2013

Tailgate Treats

Tailgate Season in Full Swing

This weekend marked another epic tailgate with Club Echa Panza. A pre-pre-tailgate kicked off a full day of festivities. At the pre-tailgate we ate Hebrew National franks on potato rolls with dijon mustard, compliments of our friend Steve. It hit the spot. The party carried on to the official tailgate, where the spread was amazing including huevos de toro (um yes, you are reading that right. no, I was not brave enough to try them). As round after round of meats & other treats were pulled off the grill I began to wonder how it could all be consumed. But as our namesake indicates, that proved an unfounded concern.  


Below, I feature two fantastic tailgate recipes, both were incredibly easy to pull together & I imagine they would be a welcome contribution to any get together during the up-coming grilling season.

Sausage & Cheese Stuffed Baby Bell Peppers

A rather large bag of baby bell peppers caught my attention on a recent trip to the grocery store. And as luck would have it, there was an enticing recipe on the back of the package. As a friend pointed out, no matter the source, a good recipe is a good recipe. So here goes, compliments of Bailey Farms of NC. 


Ingredients:
6 oz Italian sausage (without casing)
one dozen baby bell peppers
8 oz whipped cream cheese
4 oz sharp cheddar cheese, shredded
4 oz spicy Monterey jack cheese
1 egg, lightly beaten
1 garlic clove, minced
1/4 tsp cracked red pepper flakes
1/4 tsp cayenne pepper
1/2 cup panko, plus more for topping
salt & pepper, to taste


1.  pre-heat oven to 350F. lightly grease a deep baking dish with a bit of olive oil.

2. brown sausage on the skillet top over medium heat. I used an Italian sausage, but next time around I will definitely use a variety with a bit more of a spicy kick.

3. slice baby bell peppers in half, length wise.

4. in a mixing bowl, combine cheeses, egg, seasonings & panko with the crumbled sausage.

5. Fill each pepper half with a generous spoonful of the mix. 

6. line the greased baking pan with the filled peppers. sprinkle with panko.

7. bake for about 20 minutes. serve straight away or pack in foil for a tailgate or grilling party & re-heat on the grill. 

Yogurt Marinated Lamb Kabobs 
with Sweet Peppers & Red Onion


While I was on a roll, we happened to have some lamb chops in the fridge that were begging for attention. Again, these baby bell peppers proved all the inspiration I needed to pull together these kabobs. They were delicious. 


Ingredients:
8-9 wooden (or metal) skewers 
2 lamb chops
4-6 oz plain Green yogurt
2 roasted garlic cloves
5-7 dashes of worchestire sauce
1 tsp oregano
1/4 tsp cracked red pepper flakes
salt & pepper, to taste
1/2 large red onion, cut into 1 inch wedges

9 baby bell peppers, halved


1. if using wooden skewers, soak them in water for about 10-15 minutes. this prevents them from burning on the grill.

2. meanwhile, cut the lamb into 1 inch cube pieces. 

3. combine lamb with yogurt, roasted garlic, worchestire sauce & spices. let sit for about 20 minutes to tenderize.

4. remove the wooden skewers from the water & thread the lamb & veggies onto them. 

5. grill the skewers over indirect fire until the meat is fully cooked through.

6. serve with cold beer or red wine & enjoy!

April 12, 2013

Feature Ingredient: Spring Greens

Pea Shoots

In DC, we seemed to have skipped straight from winter into summer. Either way, one thing that is really special about this time of year (besides the cherry blossoms!) are fresh spring greens. On a recent trip to Whole Foods, I was attracted to a box of pea shoots. I had no real plans for them nor even knowledge of how to use them, but suspected that these could inspire something interesting. So here goes.


They taste just like fresh spring peas, go figure. But their shape allows for a wide variety of uses, in much the same way one might use baby spinach - raw or sauteed, salads or soups or even sandwiches. Really the only limitation here is your imagination. I decided to lightly saute these with sliced garlic & a bit of olive oil. Afterwards, I tossed the sauteed pea shoots with some basil pesto we happened to have on hand. This was superb & the pesto helped lend a light nutty flavor.


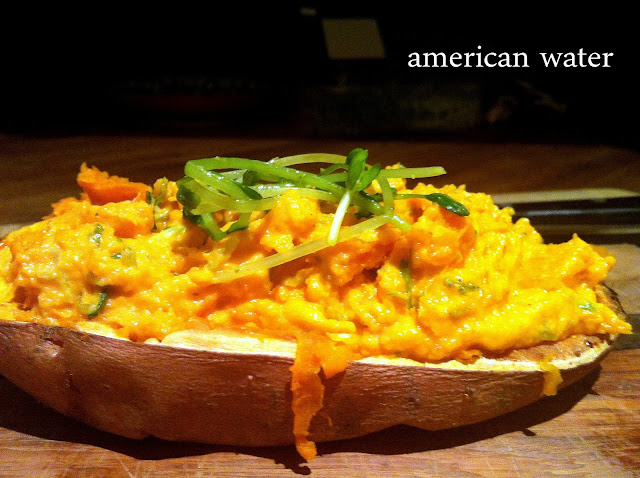
Encouraged by these results, I experimented a bit more. We happened to have a sweet potato on hand, which inspired me to try a variation of a stuffed potato. I baked the sweet potato for about 45 minutes, until tender to the touch of a fork & then scooped out the orange insides.


I mixed the sweet potato insides with a generous handful of raw chopped pea shoots, approximately 1 tbsp mayo, 1/2 tsp sriracha, and a bit of salt & pepper.


Then we filled the sweet potato skins with this mixture & topped with pea shoots wilted with olive oil & garlic on the skillet. 


We served both the garlicky, sauteed pea shoots with pesto and the stuffed sweet potatoes with steamed cod (more or less following the recipe found here). Some flaky Maldon salt proved all the garnish this combination required. These results were light, refreshing & a nice welcome into a new season of flavors. 


Dont let your creativity expire with these few suggestions, check out some other enticing offerings here. Happy weekend all - any special plans? What's cooking this weekend? 

April 11, 2013

Coddled Eggs

Coddled Eggs

I love eggs and delight in discovering new ways to cook them. Eggs are a staple protein in our house from egg tacos to variations on typical egg bakes to deviled eggs to everyday  hard boiled eggs or scrambled eggs on toast.


My mom recently gifted me a set of porcelain coddling dishes that she picked up on her travels to Ireland in the '70s. I am smitten. And this approach is quickly becoming a staple in our egg rotation. 


To be honest I had never eaten a coddled egg before. Do you eat coddled eggs often? The original instruction tag proved useful for my novice attempt at mastering the coddled egg. It is quite simple really. Fill a pot with enough water to cover the lid line of the coddler & bring to a boil. 


Coat each dish with butter (preferably Irish Kerry Gold!). Crack an egg into each coddler, top with salt & pepper to taste. Feel free to add a thin slice of butter on top. Screw on the lid to each dish & add to the boiling water for 6-10 minutes, depending on your desired firmness for the eggs. Et voila!


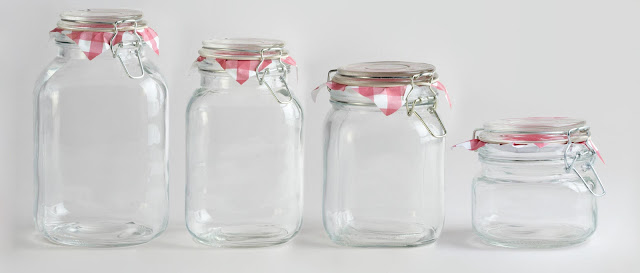
As an alternative to a proper coddling dish, a lidded jar would work just as well. These ones are available at World Market. The extra room in these dishes would allow you to experiment with different seasonings & additions to suit your taste. For instance, why not line the jar with mashed potatoes & spinach?!


Removing the dish from the boiling water can be a tricky endeavor. We tied a string to each dish for easier removal, but we still struggled a bit to remove the lid. I suggest having a few dish towels on hand to help this cause. 


Coddled eggs are best eaten with bread for dipping into the dish & sopping up the runny eggs. During our recent move, we served these one night with toast (of course) & roasted asparagus bundles with gruyere cheese wrapped in bacon. This made for a completely satisfying meal. So simple, so delicious.

April 10, 2013

Kitchen Projects: Composting

Countertop Compost Bins

Do you compost? One of our anticipated spring projects is to get a vegetable & herb garden going so that we can enjoy a summer bounty of fresh produce. We are excited to finally have an outdoor space to put to such a productive use! Our neighbor who is an avid gardener has kindly offered us shared use of his large outdoor composting bin, but we were in need an interim solution (read: odor-free). This past weekend I picked up one of these fun little countertop compost bin (#4!) that is lined with charcoal filters to abate smells.


Need a good reason to start composting? Every year the US generates more than 34 million tons of food waste, of which roughly 33 million tons ends up in landfills or incinerators where its decomposition produces methane, a greenhouse gas that is 21 times more potent than carbon monoxide. 

Looking to get started with composting? Apartment Therapy has got you covered with an abundance of helpful hints, information, and resources. 

Wait, what can you compost? You can compost more than you would think! For instance, did you know you can compost wine corks, pizza boxes, and even old loofahs?! See here for a list of 75 things you can compost that may never have occurred to you. 

--
Sources: /1/ /2/ /3/ 4/ /5/

April 08, 2013

Hi, Again.

American Water Kitchen:
Re-Open for Business

Hi folks! Apologies for the brief interlude, but Andrei and I have been a bit busy to say the least. We settled on our new house, packed up our tiny one bedroom apartment, and moved into our new house! I am pleased to report (now that we have an internet connection!), our new house is slowly beginning to feel like home.


We are facing a lot of steep learning curves in our new digs, including figuring out where to find food. I will admit I somewhat full-on dread the learning curve of a new grocery store. But therein lies the potential for discovery down the road. Once I get the lay of the land in a new grocery store, I come to relish finding new & interesting ingredients and creating culinary challenges for ourselves. 


In anticipation of the disruption of our move, I filled the freezer with some homemade meals, to give ourselves some breathing room to get the American Water kitchen up & running. This worked for about a week, until we ate EVERYTHING. I was eventually forced to overcome the panic of entering a new grocery store. 


But there were many more meals out in the interim than I care to admit. You know the scene, the Chinese food delivery eaten with wooden chopsticks out of the container surrounded by packed boxes. Casual neighborhood diner meals that prove comforting amidst a sea of change for all of their "as expected" flare. Not to mention, the champagne toast & fancy bites to celebrate our arrival into our new home.


All things told, we have eaten rather well over the last week. However, another learning curve I am facing at the moment is capturing pictures to showcase recipes with you in the best possible light. My recent photos have left a bit to be desired. I plan to spend some time this week dedicated to that task. 


But perhaps this is a great time to learn from you. Now that American Water is re-open for business, what would you like to see more of on this site? Healthy, whole grain-based recipes? Feature ingredients with several different suggested recipes? Party menus? Brown bag lunch ideas? Real life kitchen disasters? More drinks & cocktails? More short-cut & snack ideas?


If I were to sneak in a photo or two of household projects (of which there are many down the line...) would you mind? or would that distract from the focus on food? Please take a moment to share a comment about what you would like to see more of in this space. Many thanks in advance for helping me make this blog most relevant and appealing to you!

---

Photo Credits: 

the one and only: William Eggleston